QUICK START

Draw your first tile,
right now.

Chipico is a free pixel tileset and map editor that runs in your browser. Start with one tile, place it on a map, and see how it feels in a scene.

NEW PROJECTDRAW
+ PLACE
SAVE .chip

FIRST PROJECT

A simple first workflow

  1. 1

    Choose a tile size

    Create a new project, choose a language and the pixel size of one tile. If you already have a game target, match that target's tile size.

  2. 2

    Draw one tile in Tile Edit mode

    Use the pen and eraser to place pixels. Choose colors from the palette and separate sketches or decorations with layers when useful.

  3. 3

    Place it in Map Edit mode

    Select the tile from the stamp palette on the right and place it on the map. Changes made while drawing are available there immediately.

  4. 4

    Save as a .chip project

    Save work in progress as .chip. Export PNG or Godot files separately when you need assets outside Chipico.
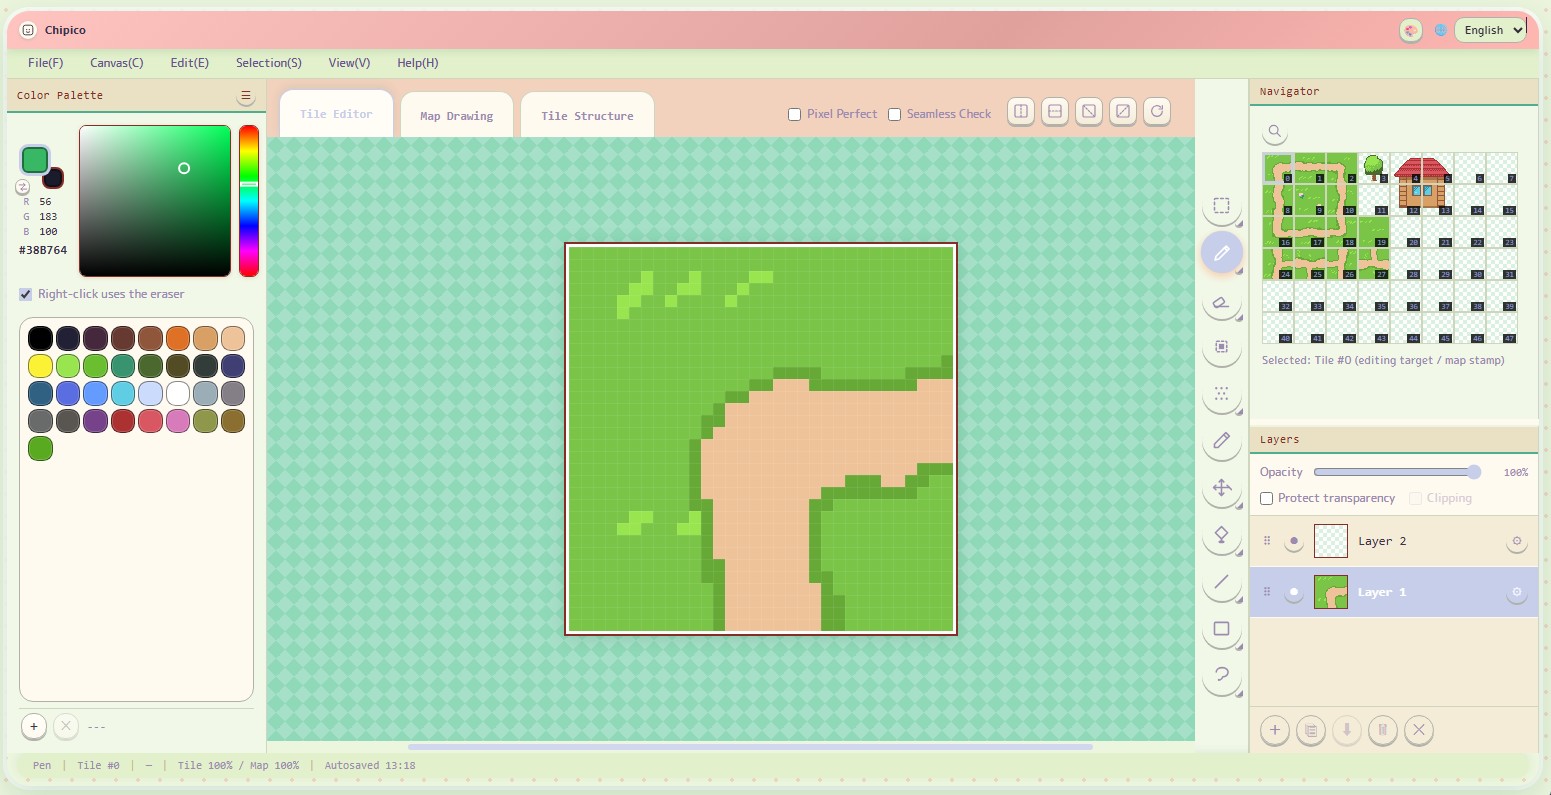
Chipico Tile Edit workspace
Use the drawing tools, palette, and layers to build your tiles one cell at a time.

DRAW AND TEST

Draw → place → refine

1

Start small

Begin with a clear tile type such as ground, a wall, or a tree.

2

Place it right away

Putting tiles on a map reveals seams and repeated patterns quickly.

3

Fix the awkward parts

Return to Tile Edit mode, improve the pixels, then check the map again.

4

Grow the set

Add terrain, decorations, and buildings gradually as your scene needs them.

NEXT STEPS

Useful features to learn next

Palettes

Save frequently used colors to keep artwork consistent, or extract colors from an image.

Selections and layers

Copy, cut, paste, and move selected pixels. Layers keep revisions manageable.

Animation

Tile Structure mode lets you register and preview animated tile frames, then save a WebP, GIF, or APNG preview.

Godot export

Export a PNG with a .tres file when taking tiles into a game. Read the Godot guide →

Open Chipico ↗See all features →